You may have seen this imposing building during your travels in the Great Haseley area of Oxfordshire. Sadly, it has fallen into neglect and the years have taken their toll. A major restoration project is now underway, aiming to return this historic building to its former glory. Follow the progress of the restoration in our blog....


The Restoration Team

Wednesday, 3 July 2013

Pawn to King4

Since the last blog entry, things have moved on quickly. The cap has been covered with canvas, and given three coats of bituminous paint. We have also been able to fit the finial to the top of the cap, for that finishing touch! Garry Kasparov would have been proud.

The painted cap, with finial proudly atop

Pawn to k4

The beady-eyed amongst you will have spotted the heavy brackets at the front of the cap. These are for the lifting straps when we crane the cap onto the tower, in the not too distant future. We are aiming for 16th July, but obviously this depends heavily on the weather.

Wednesday, 26 June 2013

The dalek gets an eye and some canvas

Gently does it
So, the time has come to put the windshaft back into the cap, ready for the upcoming hoisting. With a bit of toing and froing (and some hydraulic assistance) it was soon back in its rightful place. That's one less thing obstructing the footpath (sorry walkers!)

We have also been making the most of the settled weather, covering the cap with canvas. The triangular pieces, or 'gores', are glued and nailed into place. At least there's no pattern to match up at the edges! The canvas will then be sealed and painted black. The white/cream colour does look good, but the original cap was black, and white hurts our eyes too much when working in bright light!

Some canvas gores applied

The devil is in the detail, more specifically, weatherproofing detail. There is a bit of fiddly leadwork to be done, mainly around the front of the cap (vulnerable because, in theory, it will always be facing into the weather). We have also tried to improve a little on the storm hatch design, with a belt and braces approach to keeping out the rain. We have seen the damage water ingress here can do to a mill.

Leadwork on the weather beam, and a fine-looking storm hatch

If the good weather continues, we should be looking at craning the cap on some time early July. Watch this space......

Tuesday, 11 June 2013

Cap looking good

Finally, the cap boarding has been finished.

Planing the joints between boards

Just over half was covered with boards reclaimed from the old cap, with the remainder being fitted with new timber. The ogee shape can now be properly seen, and many of the passers-by seem to appreciate it!

The final cap shape
The 'skirt' boards have also been fitted around the base of the cap - easier now than when the cap is lifted onto the tower. Their style has been based on what we believe the originals looked like.

It looks like the final covering of the cap will be along more traditional lines; painted canvas, rather than the aluminium sheet which was used for previous repairs in the 70s. Not quite as maintenance free as lead, but just a little bit cheaper!

Friday, 10 May 2013

National Mills Weekend 11th-12th May - Mill Open on Sunday!

Although not yet normally open to the public, Great Haseley windmill will be open on Sunday 12th May, from 11am until 5pm. So come along for a rare chance to look around the mill and see the progress made with the restoration. There will be someone around from the restoration team, to answer any questions you may have.

Access is from Great Haseley, with a public footpath leading from Back Way right to the mill.

Click the link below for the National Mills Weekend website - with links to other mills open in your area....

http://www.nationalmillsweekend.co.uk/pages_wind/haseley.html

Wednesday, 8 May 2013

Stoop and build 'em up

So, the next stage is upon us; relocating the cap to the mill and rebuilding there, in preparation for hoisting onto the tower. Luckily, the weather has been fine and we have made lots of progress in the last couple of weeks.

The main cap frame timbers arrive!

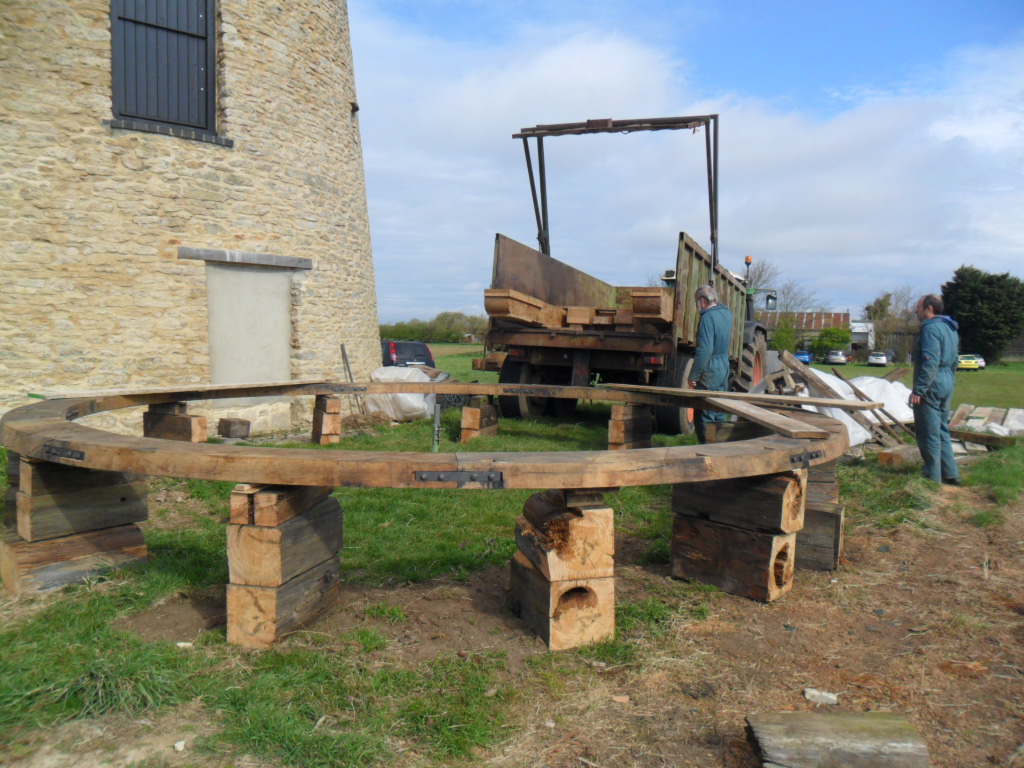
The cap circle already laid out on blocks (the blocks were made from the old sail stock - you can see how badly decayed it was down the middle)

The shears offloaded

The frame and fan booms assembled

Next we raised the lower finial section with a tripod - ready to receive the cap ribs...

Hoisting the finial

First ribs going in

The more you add, the stronger it gets!

Errr, how do I get down


With all the ribs fitted, and the ring purlin attached. Very aesthetically pleasing.
After that, with the storm hatch and fan door areas reassembled, we began boarding out the cap. Some of the boards were salvaged from the previous cap, probably enough to cover about one half. We will use new douglas fir boards to complete.


Sunday, 21 April 2013

Update

How time flies. So, after a few months of inactivity, we are all hands to the pumps again. The fan has been finished, and its staging has been trial fitted to the cap.
Rear of cap, with fan booms fitted and doorway made. Beginnings of fan gearing supports also visible.

The fan, 12 feet in diameter, with associated ironwork.


The next major task is to take down the cap, and reassemble it next to the mill. It can then be weather-boarded and lifted onto the mill. For a previous project at Wheatley windmill, the cap was completed at the workshop and transported as a whole unit to the mill. However, the Great Haseley cap is significantly larger, so this was not viable.

Meanwhile, another crucial piece of the cap, the finial, has been made by David Field http://www.davefield3d.co.uk/#/blog/4574986616/Making-the-Finial-for-the-Great-Haseley-Windmill-restoration-project./5255498

Making the GRP finial
 This will sit atop the wooden base portion of the finial (into which the cap ribs are located), the fit between the two having been designed to provide weatherproofing at this vulnerable part of the mill.

Thursday, 20 December 2012

Fan staging

With the continuing wet/dismal/cold weather, we have moved indoors to start work on the staging for the fan. The purpose of the fan is to keep the cap pointing into wind, so that the sails are properly aligned. Old photographs show the design of the staging, which supported the fan and its associated gearing. We are relying on this evidence, along with a drawing of the mill from the 70s, as there were no physical remains when we started the restoration.

The whole staging will rely on two sturdy beams (the fan 'booms') which will locate in the tail beam of the cap. These then project out of the rear of the cap. We are making the fan booms, and the associated staging, as a separate 'unit' indoors. As with the cap, this will then be taken down and rebuilt on site, prior to the whole lot being lifted on by crane.

Initial laying out of fan booms and joists


Joists housed into the booms, and uprights added, with bracing
The 'axle' for the fan will sit across the top of the two uprights. It is a large fan, 12 feet in diameter; in keeping with such a large cap. We are in the early stages of making this - we may need a bigger workshop!

Sadly, some of the gearing parts which linked the fan to the cap have disappeared over the course of time. So, we have also been welding/fabricating, as well as pattern making for casting of replacement parts.

There will be no more blog posts for a little while, so have a good festive break and check back with us in the New Year for further news!......